Friday, January 17, 2014

Staging a Home for Resale

Part of what I do is help people stage their homes for resale.  It really helps to have a second opinion to help you prepare for your sale.  Your home is one of your biggest assets and you want to make sure it looks its best prior to trying to sell it! 

My most recent client, has a home for sale in the Inverness area.  If you like what you see and are looking for a spacious 3 bedroom, 2 1/2 bath home with an unfinished bonus room area, I will have that information at the end of my post. 

The tour of this home starts in the foyer with the entryway to the master bedroom suite and then a staircase and hallway leading to the great room. 


The hallway leads to the living and dining room area.  The living room is to the right with the dining room to the left.  The sofa was tucked on the wall across from the fireplace and a beautiful console table was against the large set of windows.  I felt myself walking into the space not seeing any seating until I turned my head behind me.  I wanted to make it more inviting so that the buyer immediately walked in and saw the spaciousness and seating and wanted to sit down and stay a while.....or forever!


Here you'll see a picture of the beautiful console table I mentioned and I love the modern accessory piece on it.  I didn't feel like this vignette was getting noticed either. 


To my left was a beautiful dining space area.  It was nicely decorated and there was plenty of space for a table of 6 or more depending on how you chose to use the space. 


In the end, I decided that the living room space needed to be rearranged.  We moved the sofa to the window area.  This made it easier for potential buyers to see the seating area right away.  It also gave more presence to the tall ceilings and the beautiful windows.  The beautiful rug was centered properly which gave it more presence as well.  This is what it ended up looking like in the end.

 
On the wall adjacent from the fireplace, the console table worked perfectly under the beautiful painting.  Then I placed the modern sculpture under it. I love the look of  "traditional meets modern."  This is a great way to go when you are selling a home. 


I positioned the coffee table directly in front of the sofa.  A book, finial, and crystal turtle sit on the table as a way to welcome potential buyers sit down to relax, read a book and feel like you are on vacation. 


Floral arrangements bring life to a room.  Every room needs a little bit of life.  My client had 2 floral arrangements that I decided needed to be spiffed up.  A small silk plant sat on one of the end table.

 
In the end, I used the container to create a new arrangement.  I found some succulents in the dining room arrangement that were not getting noticed at all and added a few more along with some pebbles.  Doesn't this look more inviting? 


In the dining room area, there was another arrangement.  Again, I felt like it needed some refreshing and wasn't adding to the space like it should. 
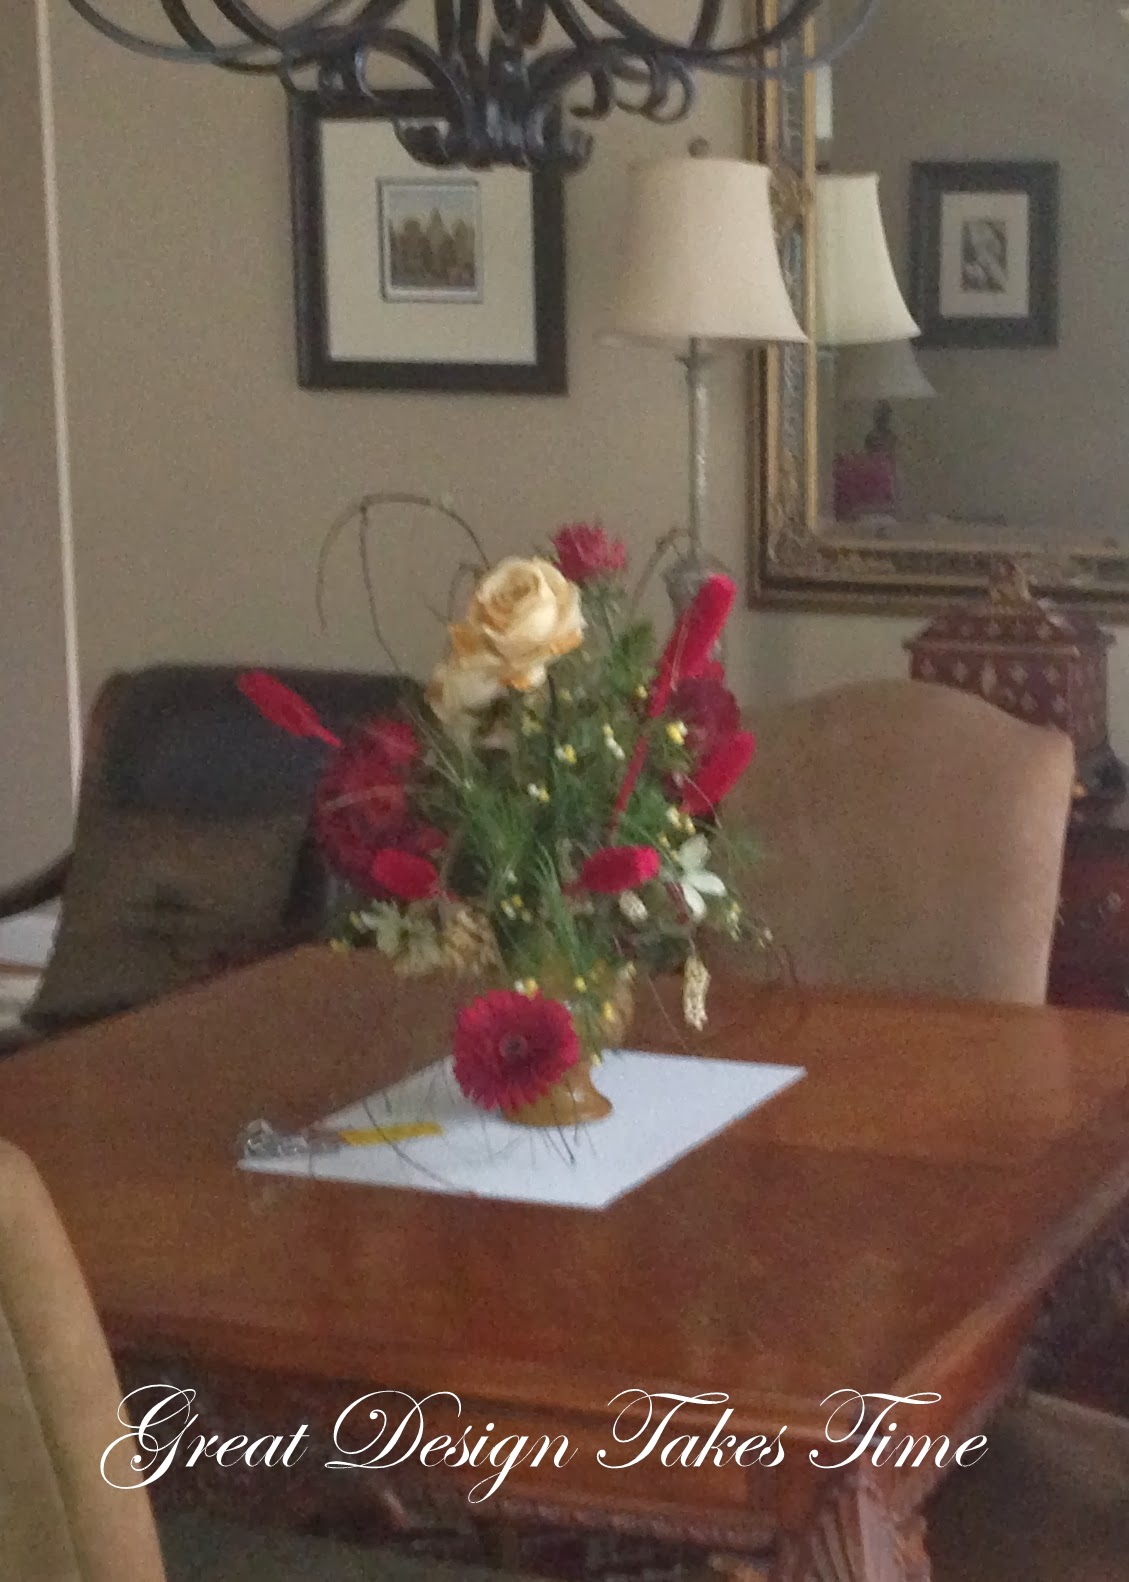

If you know me, you know I love to reuse items and make them work.  I decided to use all the flowers and remove some of the dried out greenery.  Really what it needed was the presence of a main flower.  There were red hydrangeas in the arrangement so I added a few more, then added some fresh green eucalyptus.  This is how it looked afterwards!  Can you tell the difference?


 My client has really done a great job in upgrading the kitchen and bathrooms.  Personally, I like seeing a bathroom and kitchen space that looks brand new, clean, and unused. We decided not to do anything to those areas.  Hasn't the kitchen been beautifully remodeled?


This is a view of the space above the great room.  Right now my client is using it as an office but the possibilities are endless.  Also upstairs is the unfinished bonus room space.  I wish I had taken a picture of it.  It could easily be turned into another bedroom or playroom.  There was a great space where you could have a built-in bunk bed.  What a cool space for a child that could be!

 
In the end, I was able to use most everything the homeowner had.  Only a few items were needed to make this space ready to sell.  Many of the items in the home already were from consignment stores.  Many pieces were purchased at Classic Home Decor Consignment in Pelham, Alabama. 
 
If this home is of interest to you, you can get additional pictures and more information by going to:
 
 
Remember, your home is one of your most valuable assets!  If you are preparing to sell, consider having someone stage your home before putting it on the market. 
 
Until next time, remember Great Design Takes Time!
 
Lisa


Friday, January 10, 2014

Chalk Paint


There are many ways to make chalk paint.  You can use baking soda, calcium carbonate, Plaster of Paris, and a number of other chalk type materials.  I chose to go with Plaster of Paris because that is what I have heard more about.  To get started, you’ll need:
  • Plaster of Paris
  • Water
  • Flat Paint
  • Mixing Stick
  • Paint Brush
  • Sandpaper
  • Wax (My choice was Minwax)
Basically, mix Plaster of Paris with water and create a pancake batter consistency.  Make sure you get all lumps out of it.  You’ll want to do 4 parts flat paint with 1 part batter.  Stir, stir and stir until it is evenly mixed into your paint! 
 
A couple of tips to keep in mind:
  1. Mix small batches because the Plaster of Paris thickens quickly.
  2. Add water to your mixture as it thickens.  If you notice that it is going on really thick, thin it out!
  3. It’s better to do several thin coats instead of 1 thick coat.
  4. After your first coat, sand any imperfections that you may see and reapply chalk paint if coat is too thin.
  5. Paint in the direction of the grain of the wood.
Once you have painted your piece several times, you’ll want to choose the look you are going for.  I suggest at least finely sanding your piece to again get rid of any imperfections in the chalk paint.  You’ll want to sand with the grain of the wood.  For a piece that you want to distress and show the grain of the wood use a heavy grit sandpaper.  For a piece that you don't want to distress, use a fine grain sandpaper.  If you are working with real wood, you will want to focus on the edges of the piece where you would find natural wear.  I sand with the grain of the wood but I’ve seen people sand against the grain and in all kinds of directions.  It really just depends on the look you are going for!

Next, you’ll want to apply a thin coat of wax with a clean soft cloth.  I worked on my pieces one side at a time.  When I got my first coat on then I would go back and buff before it actually dried.  Again, I applied and buffed with the grain of the wood.  Then once the tacky is gone I buff, reapply, buff and buff again.  The wax will give more dimension to your piece and will somewhat age it to a somewhat darker color.  You can also choose to use a wax with stain to darken the piece. 
 
My first piece was an antique Tom’s Peanut cabinet from my grandparent’s old Gulf gas and mercantile store that was on Old Highway 280 in Westover, Alabama.  I have had it for years and painted it a number of times.  This time I decided I would try distressing it to give it more of an antique look.  I decided it was perfect to display my keepsake blankets. 


 This is an antique door from an armoire I had.  I have taken it over to my neighbor, Joanne, who has a magnetic chalkboard business.  She is going to help me re-purpose it into a chalkboard.  I hope to soon have photos of how it turned out.   
 
The armoire door is made out of oak and was stained dark.  This was a great piece to distress along the edges which is exactly what I did then I put a clear coat of wax on it and buffed it out. 
 
I painted these candlestick holders for my daughter's fall auction at school.  They turned out cute.  The high bidder has already told me that she has them on a tray on her ottoman in her living room.     


This is my latest adventure.  It's a settee that I am having upholstered.  This is what it looked like before I began.
 
 
This is how it looks now.  I plan to finish it by glazing it to give it more depth and more of a french finish.  I'll have to show later how it turns out but here it is for now.  Isn't it amazing how paint can freshen things up?


 I have always wanted to try chalk paint but had never used it.  Being a decorator, I have distressed a number of pieces with other techniques but never done anything for myself so these were my first pieces.  If you are thinking of trying chalk paint and have never distressed furniture before, I suggest you try something small, like a candle holders or any kind of wood accessory. 

I love the process of distressing furniture.  It can add character to your home and help re-purpose a piece you may otherwise discard)
Until next time, remember that Great Design Takes Time!


Lisa

Saturday, January 4, 2014

Year in Review of 2013 and Forecast for 2014


2013 was a great year for projects in our home.  Being a decorator, there is always something in progress in my own home.  I work those projects in as time allows and I completely see why people need a decorator of their own.  It takes A LOT of time, preparation and energy. 

I had a long list of projects at the start of 2013 and I completed most of them.  In looking through them, here were my favorite ones. 

Before I started the blog, we had started a master bathroom project and were finishing it up.  It started out with white tile and lovely dusty rose counter tops.


It ended with beautiful tile, a warmer paint color, an antique soaking table, a custom designed shower and reconfiguring and adding to the existing cabinets.  Here's a refresher of what it turned out like. 


In 2013, I created a family wall collage for my living room.  Wall collages are fun!  They are a great way to display a collection and fill a wall.  I love being able to help clients do this in their home and I was glad to finally put my own family collage together. 


Since I have lived in my home, I have looked up at the empty space over my foyer door.  It was really driving me CRAZY so I decided that I had to figure this space out.  I knew I didn't want a floral arrangement or statues in the space.  I was glad that I was able to come up with someone to draw the eye upward when people come to my home. 


I created a number of florals for my home.  This one turned out to be my favorite one. 


I have distressed furniture for a number of years using latex paint.  I had wanted to try chalk paint but had not.  In 2013, I finally decided to give it try and IT IS ADDICTIVE!  I have since done a number of techniques using chalk paint and have learned a lot.  An old Tom's Peanut cabinet that came out of my grandparent's store was one of the first pieces I finished.  I turned it into a linen cabinet to store some of my cherished pieces. 


So what is instore for 2014?  Here is my list: 
  1. Complete my upholstery projects - settee and chair.
  2. Complete my living room makeover.
  3. Add window treatments to our master bathroom and a few final decorative touches. 
  4. Purchase a sectional sofa, ottoman and window treatments to our downstairs den.
  5. Give the guest bedroom a makeover.  I am going to distress the furniture and have been researching what route I am going to go in this.  I can't wait to get this project started.
  6. Give my master bedroom a face lift with fresh paint and nightstands.  This will complete what I have already started in there.
  7. Turn my office into more of a sitting room/office.
  8. Paint my dining room. 
  9. Decorate my patio and landscape around it.
  10. Finish face lifting the exterior of my home with farm shutters.
I know it is long but it is attainable.  I can't wait to share more with you from my home in 2014.  I have lots of new ideas coming that will include tours of other homes, designer stores and craft projects.  I can't wait to get started!

Until next time remember, Great Design Takes Time!

Lisa


Sunday, December 22, 2013

The Enjoyment of Christmas

After all the decorating is done, I love to sit back and enjoy time with family and friends.  As I wrap presents, bake and make crafts with my daughter, I enjoy the ambiance that Christmas brings. 

In my foyer, I created a Winter Wonderland scene with trees and snow on the ledge. 
 
I love sitting in different parts of my home and looking up at the lights from the foyer ledge.  I can't help but be in the Christmas spirit with this scene. 

My Christmas tree is full of memories.  I have ornaments that my aunts made me as a child; ones that were my fathers; ones my uncle painted with us one year; and now ornaments that my daughter makes.  It is tied together with burlap ribbon, rust woven ribbon, copper bells, and white lights.  As I look at it, floods of memories come to mind and bring a smile. 

Hanging in the windows are small wreaths with fresh green mesh ribbons. 
 
In the dining room, I keep my centerpiece fresh with different types of greenery from my yard.  It reminds me of Mrs. Self, a friend of our family from my childhood, who taught me you could always pull things together from your home and yard to create a centerpiece.  It brings a smile to my face to think of her. 
 
 
When we come home at night, we are greeted with the twinkling lights in the palladium window and the ring of the jingle bells in the wind. 

I love this time of year.  It's a great time to be creative with decorating, crafts and cooking.  I wish you all a Merry Christmas and look forward to blogging with you more in 2014.

Remember, Great Design Takes Time!

Lisa Wills

Saturday, December 21, 2013

Christmas Door

The first Christmas we were in our home, I was on a limited budget.  We bought a home that needed windows, a roof, a new kitchen and lots and lots of work.  Being on a limited budget, is not a bad deal for me.  Seriously,  that's when I am my most creative!  I wanted to do something different to my front doorstoop.  Like every decorating job I do, I look at what I have to work with first. 

I found that I had a jingle bell wreath that my husband's father gave us.  It was bright red, green and blue.  For those of you who know me, not my colors, but nothing that a little spray paint couldn't fix!  I sprayed it copper and then added a fresh green silk ribbon to it. 

 
I then struggled to figure out what else to do so I went to the Dollar Store.  Didn't you know they are a designer store?  Well, they can be if you are creative.  Afterall, it's the creativity that makes things have design.  I found some shiny brass jingle bells!  My theme started coming together! 


The following year, I found a large jingle bell and added it to the mix.  It became the centerpiece of all the hanging bells. 


In the end I spent less than $20 and was pleased with the outcome. 


It's amazing what you can come up with in your own home and with a little creativity. 


Hope you are enjoying the holiday season!

Remember, Great Design Takes Time!

Lisa Wills

Monday, December 16, 2013

Christmas Mantle

The fireplace mantle is the focal point of the home.  At Christmas time, I love playing this area up.  Afterall, this is where Santa Clause comes down the chimney with toys to share!

 
The most special part of my Christmas mantle is the "Merry Christmas" wood heart garland on twine.  I made this for my mother my senior year of high school.  I remember my father drilling the holes in the hearts and me painting them.  Then I remember carefully using my best print that my mom taught me to do the lettering.  It brings a smile to my face and warm childhood memories of my family.


My mom gave me these cute wood reindeers to add to the center.  I actually bring them out in the fall and leave them out through Christmas.  


For years, I wanted to make my own stockings.  I grew up with a mother who was verymuch a homemaker.  She made my brother and me our very own stockings.  I wanted to do the same!  When we moved into our Marwood home, I asked my mom to help me.  We took upholstery fabric and lined them with fleece. 
 

Then trimmed them with various types of trim for each family member.  This is the trim my daughter chose for hers.  This will be a memory I will always cherish and I love how they turned out. 


The candles are up all year around but I enjoy lighting them more at this time of the year when we have friends and family come over and light them.  The candleholders are a mix of rustic wrought iron and then a pair of carved olive branch wood.  I chose to to mix the colors of candles and love how they turned out.  I would have never done it that way except I was trying to use what I had already.  I think they look perfect.


Christmas is my favorite time of year to decorate and I enjoy sharing and hopefully inspiring you. 


Remember, Great Design Takes Time!


Lisa Wills


Thursday, December 12, 2013

Dining Room Christmas Table


I love coming up with a centerpieces for my dining room table for different times of the year!  This Christmas, I decided that I wanted to use some of my silver that rarely gets used.  I remember being a child admiring my Maw Maw Dodd’s silver and wishing she’d actually use it!  When I got married, she gave me some of her silver and since then I have added a number of pieces on my own.  
I pulled out a silver hollowware epergne that has 3 hanging baskets.  I have never used it and decided that I wanted to put it to use!

 I also had a holloware cake stand that I had never used.  It gave the epergne the right height. 

I added various champagne, cream, and white glass ornaments to the bowls.
 
I added variegated Pittosporum from my yard.  I was thrilled to actually have something I could use from my yard.  I planted this shrub at my old house and when we redid our landscaping I made sure I planted it again.  It is used by florist and stays beautiful all year, giving you something to always decorate with in your home for special occassions!

 
 I then found these adorable Santa Clauses in my attic and added them to the base of the arrangement along with more ornaments.


I found these great fresh green ornamental stars and balls at an end of Christmas sale last year and decided to hang them on the chandelier. 

In the end, I was pleased with the outcome and glad I was able to use some of the dressier decor I have in my home. 


Take a look around your own home.  You might be surprised at what you can come up with right under your nose!
 
Remember, Great Design Takes Time! 
 
 
Lisa